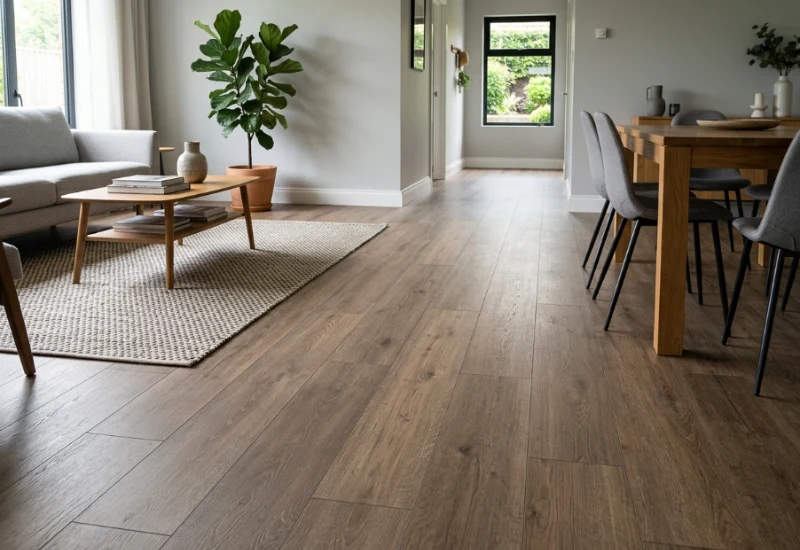
Whenever it comes to the installation of flooring in your living place in order to make it more beautiful, most people go on hardwood flooring. Because it gives a classy and elegant look while making your entire place much more comfortable with its texture. Hardwood flooring is the top choice of everyone who likes to add decorative elements in their dearest home space-time to time. Although it is expensive yet it manages to get installed in the very first place.
However, here is a frequently asked question which usually most people ask, i.e. how to install the hardwood flooring. With that being said, let me tell you that its installation process is not so easy. You need to hire professional services for the perfect installation. Because the purchasing of the flooring costs you a lot, so you might want to it be lodged perfectly at your place.
Spend some money on hiring professionals and make your home space look much more adorable. But, if you still want to get it done by yourself in order to save money, then in this article you are going to know the installation process of this professionally manufactured hardwood flooring.
Steps Regarding the Perfect Installation of Hardwood Flooring At Your Precious Place

Although hardwood flooring is expensive it gives your space a luxurious look in a very perfect manner. In addition, you have to spend some money on hiring a professional. But, you can save it by following the below-mentioned steps in a very proper manner.
So that any or every area of your precious home place could gain a modernized look with such a classy floor covering. These steps are complex, yet if you invest your time and energy into it you can get an appealing living space while creating a welcoming atmosphere.
1. Get Yourself Prepared With the Necessary Equipment

First thing first, before you start the installation process of the professionally designed hardwood flooring at your place in order to make it look more beautiful, you have to get yourself prepared.
Get everything that you might need in the installation process so that you won’t get frustrated during the process by not having anything. Things that you need might include a drill machine, drill bits, flooring nailer, hammer, nails, floor molding, and flooring accessories. When you get all these things, then you can start the installation process.
2. Get the Floor Prepared to Install Hardwood Flooring

When you get everything that you might for the installation process, now is the time to get your floor prepared so that it could take the installation of these hardwood flooring planks easily. For the perfect lodging of your hardwood flooring, it is necessary to get your subfloor leveled and smooth.
Otherwise, the installation won’t go smooth and your space won’t get an attractive look. You can do this by sanding the subflooring, covering up all the seams and gaps, bringing the flooring to the same level.
3. Install the First Row of Hardwood Flooring Planks

After getting the subfloor leveled enough, now start the installation process. Install the very row by arranging the tongue side of the planks facing the center of the room. While installing these planks, make sure that there is a gap between the planks and the wall by placing a spacer between them. The gap should be almost ½ inches.
This space will allow these wood planks to expand by heat and humidity, thus the gap will be covered automatically after the installation. For the secure installation, pre-drill the nails holes about ¼ inches into the planks from the narrow side and ½ inches from the wall. Continue pre-drilling these holes at about 6 inches intervals for the length of each board.
4. Get the Nails Countersunk For the Secure Installation
After you are done with pre-drilling the nail holes, now countersink the nails with the help of nail punch. Now get the nail holes filled with the matching putty. After that, you have to blind-nailed at an angle of 45 degrees through the tongue of the plank. Ensure that you perfectly countersink the nails so that they don’t interfere with the board-to-board connection.
5. Use the Fit And Lock Methods On the Boards

After the secure and how to installation of the first row, get the second row installed. While lodging down the second row, make sure to lock the tongue and groove of the boards with each other with the help of a mallet. Also, block for a tight fit between the boards. Also, get the ends of adjoining boards staggered altogether by at least 6 inches. Furthermore, in order to create a more stronger and attractive flooring pattern, cut the end boards down.
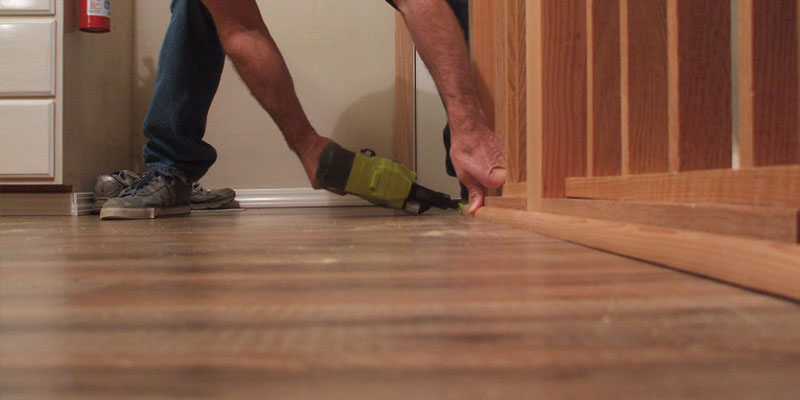
6. Ensure the Perfect Installation With the Help Of Flooring Nailer

Just like the very first row, now blind-nail the second row through the tongue of boards. Repeat this step until there is no need to use the flooring nailer. After you are done with the installation of at least two or 4 wood planks, now you can use the flooring nailer for the perfect lodging of the entire flooring. While you are using the flooring nailer, make sure to use it by installing the nailer’s protective boot in order to protect the floor covering.
7. Install the Last Rows And Finish The Installation Process

When you reach the installation of the last rows, start nailing them by hand. While installing the very last row of planks, cut the planks to fit, and measure the distance from the wall to the board. Check if the last piece is 1-inch wide or less, then install it by applying a small amount of glue to the tongue and groove.
In order to protect the wall, insert that final piece with the pry bar. Or, if the piece is larger than 1-inch, then, face-nail the piece, get the nails countersunk, and fill up the holes by matching putty.
8. Clear Up the Mess And Allow The Place To Look Adorable

Now, install the shoe moldings and baseboards for the proper finishing. Clear up all the mess that you created during the installation process. Then, vacuum the floor so that the floor will give a neat and clean look. Thus, allowing your living place to gain an appealing look with the charm of newly installed elegant floor covering.
To Sum Up
At the end of this article, I will recommend hiring professional services for the proper installation of hardwood flooring at your place. But still, if you want to give it a try by yourself, then follow the above-mentioned steps in a proper and get the perfect installation done of your beautifully designed home flooring, and make your dearest home space an attractive place.